Saturday, December 18, 2010

From Disney Princess to EPIC don't-mess-with-me Super Woman

Over the weekend, Heidi went to Chinatown and got some FABULOUS gold fabric to go along with our dress hoop skeleton. She single-handedly sewed together the ENTIRE dress, and now it looks AMAZING! When Consuelo wears it, she literally looks like a Disney princess.
Heidi preparing the fabric.

Tada! Dress!

Transparenty fabric Heidi got along with the gold material.

Perfect fit!
So with the change in fabric, I think the aim of our dress has changed as well. Since the semester is starting to wrap up, we decided to focus more on the skirt itself instead of the entire outfit-changing concept. The question now is on how to make the dress more dazzling? How to incorporate more features into the dress to make it stand out from an ordinary dress?

The translucent shawl was draped around the skirt to give it a more "layered" feel. Eventually, we'll have the enter of the shawl pull upwards toward Consuelo's stomach so it creates a curtain-like shape, bringing attention to the dress.

Aside from the dress itself, we decided to go with a tube top for Consuelo, along with two small sleeve armbands. Annie made the armbands to resemble the small sleeves of Disney princesss Belle.
Our dress resembles that of Belle's, except for the fact that the Chameleon Suit is pimped out with motors and LED lights, making it a far more technologically advanced dress than Belle's ^__^

Once the dress-to-skirt conversion completes, LED lights embedded within the armbands will light up.
Consuelo also found a tiara to go nicely with the dress, so I took the liberty of putting in LED lights into the empty spaces in the tiara as well XD.
Each armband is embedded with 7 yellow LED lights, which are powered by two AA batteries. 

Although not super bright, they add a nice touch to the dress!

Because we ran out of yellow LED lights, and I might be somewhat color blind, I thought these green LEDs looked awfully yellow, so I put them into the tiara...but they turned out nice!
Consuelo programmed the microcontroller in charge of the LEGO motors to execute just the right amount of rotations for each individual movements. The shawl will be pulled up by a single motor hanging in the front (hidden inside the skirt), then the two side motors would automatically roll up the skirt itself. Once that's done, the skirt will once again go back down and become a full dress. XD Nice job!

In the end, our pimped out convertible Disney princess dress looks like...*drum roll*

Fabrics and zip strips!

Hoorray! We got materials!

In order to construct the hoops for the skirt, the team has decided to use zip strips. The original idea was to either use actual wooden hoops, or use metal wires as hoops. However, we decided that wooden hoops would be WAY too heavy, and hard to collapse together, and metal wires...well, we had difficulties finding the right thickness for our hoop, and we thought metal wires might not be rigid enough to retain its hoop shape (we could have easily bent the wires while wearing the suit). So zip strips it is!

We worked hard over the week and constructed several hoops for the skirt. So instead of using one hoop per each segment of the skirt, Heidi suggested we have hoops of the same size to line down the legs (So it's kind of like wearing a tube instead of a skirt), and attach hoops of increasing size to each of the central hoops as we go lower. That way, the strings can pull directly on the central hoops in a way that's perpendicular to the ground, thus avoiding us having to calculate the angles and length of the ropes.
We taped two large zip strips together to form the bigger hoops for the base of the skirt.

Wire strippers sure come in handy when you need to put something, but shears work just as well XD
Consuelo testing the central hoop concept ^__^


To reinforce the bigger hoops onto the central hoops, we made support beams out of cardboard paper and smaller zip strips. Each hoops gets four reinforcements, one on each side to ensure the hoop gets pulled up in an even fashion.
Attaching reinforcements to the hoops.
The end result of the hoop construction looks like this:
The strings remain perpendicular to the ground by pulling up the central hoops of the dress.

We also attached the LEGO motors (two, one on each side) with valcro and tape. 
So the hoops are made now! We also bought some shiny lightweight black fabric to see just how the skirt will look when the hoops are actually pulled up with the dress fabric. And based on initial testing, it looks like this concept will work!!!
Attaching the fabric temporarily to the hoops were a pain! But we managed XD

Because the fabric was so large, we realized that  we will need to sew it onto each individual hoop for the pulley to work properly. 

Final product for testing! And it works!
It's nice to finally have the skirt working. Now all we need to do is jazz it up and refine the shape of the skirt to make it look more...pleasing. As well as program the LEGO motors to behave properly.

Complete Transformation of Chameleon Suit

We still have a lot of work ahead of us after deciding to use the LEGO Mindstorm motors. At the same time, I'm very troubled about the bulky size of those motors, especially with all those sensors and extra spools attached to them.
So I've been looking up dc motors on the side. I remember these toy race car models I used to construct when I was little, and they all used a simple dc motor. The entire system was super simple to implement, and the motors were TINY!
AuldeyToy Race Car
Simple dc motor used to power those cars.

I played around with some of the motors I had on hands, and found out they were indeed very easy to implement and adapt to our skirt. But the problem with these dc motors I had was that they had SUPER low torque, and can barely lift any weight. Another problem was that they only rotated in one direction, at a set speed (super fast), and will continuously rotate until the power is cut off. So yeah, that's definitely problematic for our design. So the dc motor idea was scraped. 

After much deliberation and talk with Orit, we went through an entire design overhaul. Our initial concept for a chameleon suit was drastically altered!


So this new concept is inspired by superheroes' difficulty in changing their outfits (i.e. Superman ripping over his shirt every time, so inconvenient and not cool looking). In order to solve this problem, we are keeping our original skirt changing concept. But instead of having the skirt bunch up, we've decided to use....wait for it.....HOOPS! XD Not only are hoops easy to pull up, but they're also very form-fitting (no more weird shapes forming from the skirt getting pulled up). We can hide the bulk of the motors inside the hoops. The final reason that hoops are cool is because Wellesley girls have hoops! So it's not only a superhero costume, but a Wellesley superhero costume :)
In addition to the skirt going up from full length to knee-length (from conservative office look to fashionable look), we also want to have exaggerated hoops for the sleeves/shoulder pad as well. The sleeves will look like a loose blouse-y form initially, and then "roll up" into segmented shoulder pads (to protect a superhero's shoulder of course!)

From traditional Wellesley office girl....
To EPIC Wellesley superhero!!! (With hooped short skirt of course!)
So based on this new design, we feel the suit will be much more straightforward to implement. Next step: get fabrics and materials!

Adobe Museum

I went to take a look at the Adobe Museum mentioned in the class. The concept of a virtual museum is really fresh.
Adobe Museum of Digital Media

The aesthetic of the museum really caught my eyes. Since there is no limitation in designing a virtual reality dwelling, the designers are able to bring to life all kinds of awe-inspiring structures and layouts. The entire museum feels like it's from a science fiction book, with the towering architecture and hologram prompters. I especially enjoyed watching the jellyfish/eyeball "tour guide" implemented by the designers. They really brought the entire museum experience to life by creating something that I feel like I am interacting with/having a conversation with.
Eyeball-like floating devices that guides the user through the museum.
However, aside from what it has to offer as an unique sci-fi exploration, I didn't really find the whole "virtual museum" concept believable. The navigation option offered is very linear, even though the designers attempted to re-create the way how museum-goers usually traverse through exhibits. I'm prompted with clickable "icons" to decide where to go, and that just makes me feel as if I'm looking through any ordinary web page. It might have helped if instead of opting for the clicking mechanism, the museum allows people to navigate through it by re-orienting itself depending on the location of the mouse (i.e. moving the mouse to the left means turning leftward, right is rightward, up is forward, and down is backward). At least the movement of the mouse mimics real life actions.

Main navigation "page", where the user can select which exhibit to view and what information to look up.
The exhibit I saw is tailored especially for this virtual museum, so it relied very heavily on visual animation and sound. But because the visuals are limited to my screen (thus under the mercy of my computer's graphic card ability), and the audio is at best stereo headphone sound, my entire experience feels flat. If the same exhibit was moved to an actual museum room, then other ambient factors such as echo, vibration, reflection, etc will all have played extremely important roles in how I interpret the artwork.
In the recent tour we went to the Davis museum, I was very impressed by the whale room piece in the Calculated Risk exhibit. That piece utilized the entire room to present itself to the viewer. I was able to move around and observe the entire whale and harpoon components from different angles, and under different lighting. However, this is not possible in the Adobe virtual museum. So I find the virtual museum experience very limiting, and it feels like a cheap rip-off of the real museum experience.

Monday, December 13, 2010

LEGO Mindstorm!

Continuing with the improvement of our Chameleon Suit design, we've decided to implement the suit using LEGO Mindstorm components. Although our initial thoughts were to use Phidget sensors and motors, we soon found out that Servo motors are extremely limited in their range of motion, and are not very suitable for our design. Another problem with using Phidgets is that we need to somehow hook up a computer to the sensors and motors, which will add an enormous amount of bulk to our suit (thus not ideal). However, LEGO Mindstorm has this block-sized microcontroller that's as big as a bag of chips, which is not too bad compared to carrying an entire laptop computer on the suit. The Mindstorm kit also comes with pre-made sensors such as touch sensors, sound sensors, etc., which will be perfect for what we had in mind for input. And the best part is, their motors are programmable! So we can actually program a set number of rotations on the motors, and have it change direction and all with some simple codes ^___^.
LEGO Mindstorm sensors and motors


Although the size of the motors are a little bit larger than what I had in mind (compared to Phidgets motors and normal dc motors), the amount of customization available to the LEGO motors from the microcontroller makes up for it.
Size comparison of the different motors. From left to right: dc motor, LEGO Mindstorm motor, and Phidgets Servo motor.
Using the proposed LEGO Mindstorm motors, we constructed some sample structures of the skirt action. By using the rubber band waist of the skirt to hold up the motors, we managed to attach one motor to each side of the skirt. There's a spool on each motor that holds up a thin string, which connects to the bottom of the skirt.
However, we soon realized that with only two strings (one on each side), the skirt will not be pulled up evenly. A lot of fabric in the front and back of the skirt will just hang limp. Therefore we decided to attach an extra spool to each of the motors using a lot of LEGO connector pieces, and used a rubber band on the spools to connect them to each other. And the end result looked like this:
Two spools per motor, with the strings connecting to the left and right side of the skirt as well as the front and back of the skirt.
This implementation KIND OF worked. The skirts managed to get pulled up, but the fabrics looked bunched up together where the strings are, and it just basically didn't look aesthetically pleasing at all. Another problem is that now the size of the whole pulley system is ENORMOUS. We were thinking of making a extra large belt to cover up the motors...but that probably won't work out too well x__X.

So there's still a lot of bugs and problems to be fixed with the skirt, as well as implementing the movement structures for the sleeves and collars. 

Exciting Lecture!

Ben Shneiderman, one of the epic founding fathers of HCI, came to Wellesley last week! He talked about some really exciting things regarding data visualization and his current works. 
I was very inspired by what he said during lunch the day of his visit. He believes very strongly in conducting research and create projects that will have a positive impact/benefit for the community as a whole. One of the projects that he spent several minutes on was the Children's Books Online: the Rosetta Project, where a team of volunteers translated and made the largest collection of children's books available to everyone on the internet for free. 
He also talked about many interesting topics during the meal, such as virtual reality (specifically Second Life), and mentioned online games such as Farmville and World of Warcraft, which I thought was awesome!
But yeah, onto the main topic of his lecture. 

I'm quite inexperienced when it comes to the field of data visualization. There was some exposure to this topic when I worked on the GnomeSurfer (blast, expression, etc), but I feel like I barely scratched the surface. So when Ben Shneiderman started talking about data visualization and showed us some of the projects he's been helping with, I was quite awed. Honestly, I've never seen a heat map used in the way he showed on his presentation before! It was one of the coolest things I saw that week. 

A heat map showing stock market information.
It's so important to have effective visualization for large data sets. How an application render data can either make or break it.  


Overall, I really enjoyed and learned a lot from the lecture. 

Sunday, October 24, 2010

Wire, paint, etc

TeamBAMFness got a lot of great feedbacks and suggestions on our first prototype of the Chameleon Suit.
Most people thought our idea was really creative and exciting, but they also had questions and concerns regarding the actual construction of the suit and the implementation of the features we proposed. 
One of the more often mentioned concern was regarding the subtleness of the suit-morphing in public. Will the suit instantaneously attempt to change it's shape while the wearer's performing certain tasks? Can there be a way to stop the transformation once it has begun? How can the wearer prevent unwanted attention while transforming his/her suit? 
So to answer these questions, I began to look more into the technical aspect of the project (such as researching more in-depth about Muscle Wire's capability and restrictions). 

Muscle Wires is a patented brand of Shape Memory Alloy (SMA) that exhibit hardness and elasticity properties that change radically at distinct temperatures. Since the hardness and shape of the wire is predefined beforehand, every time there's a specific temperature change, the Muscle Wires will react accordingly. 
This is a video I found on Youtube that illustrates the concept of Muscle Wires. However, in this instance, the experimenter activates the wire with hot water. For our project, we will be using electrical currents to heat up the wires instead.
While researching more into the physics behind Muscle Wires as well as the price range for ordering them in bulk, I ran into this slight dilemma:
          Since Muscle Wires will only transition between its different states through temperature change, in order to revert the wires back to its original state, we'll have to come up with a way to cool it down. I'm surprised I haven't thought about this beforehand. Sure, we can use electrical current to make the wires bend and retract (in order to simulate a sleeve shortening action), but how can we get the sleeve back down again? The wearer could just pull on the sleeve to revert it back to its original position (this might actually be a better idea), but somehow the idea of manual movements to affect change to the suit bothers me. On one of the feedback surveys we got back, one person asked "can't she just scrunch up her sleeves?". That is true. What makes our suit so special during transformation? What we're proposing for the sleeve extension and shortening acts pretty much the same way as if people are pushing their long-sleeved shirt upwards. Maybe we should rethink about the concept of sleeve transformation.
I think this picture illustrates the concept of rolling up a sleeve. In real life, there're so many different ways to roll up/shorten a long sleeve, and different people apply different lengths to their sleeves under various circumstances. We proposed on changing the long sleeved shirt into a short sleeved shirt. But what about all that extra material? Will they just all remain bunched up on the wearer's arm like in the picture above? Or is there some way to divert those extra fabrics so they're no longer visible, and the sleeve can actually resemble a short sleeve?
This is an issue that needs more thoughts from all of us. 

Aside from the brief mechanical component of the suit that I thought about, I also looked into the different type of designs we can have for the suit. We mentioned using LED lights embedded beneath the suit to give it more flavor and personality. I still think this is a good choice, because not only can we use different colors of LED lights, but we can also arrange them into different patterns/shapes (ie. shape of a tie, flower, etc). That way only a certain pattern will show up under different conditions. 
Lights are always good, but what if there're some other types of transformation we can adopt for the outward design of the suit. Some of the feedbacks we received mentioned temperature-changing ink and UV ink. One of the sites I visited during research offered Therochromic Ink, which has the ability to change color based on temperature changes. This technology is very common in baby products. I've seen baby spoons turn from white to pink if the food on it is a bit too hot. 
Baby spoon turning from blue to white when in contact with hot food.
We can definitely use this technology in our suit. If the temperature is hot (ie. summer weather), the base color of the shirt can be a light/summery shade. If the user wears the suit in the winter, maybe the color can be a darker/solid shade. Although temperature is an external input, it can very much be linked to a person's mood. I know that in the winter I'm much more subdued and serious than I am in the summer. Different temperature definitely affect people's mood. By countering the expected mood change with a different color on the suit, we can help the wearer feel more lively or calm. 
Another idea is to use ink that's sensitive to UV light. These inks are very popular in tatoo industries as well as frat parties (ie. black light). It'd be pretty cool to have special patterns on the suit that'll only be visible when the wearer is exposed to blacklight (such as dance parties). That way, those patterns can be somewhat daring, and the wearer doesn't have to fear about making the wrong impression at different settings. 
Tattoo done in UV ink becomes visible under partial blacklight. 
There's a lot of food for thought from the feedback we received, and even more areas we can explore in order to make our suit more user-friendly and exciting. I can't wait to get my hands on some of those Muscle Wires and special ink!


Team BAMFness Prototype Creation!

So for the upcoming Milestone of the TUI project, we had to make a low-fidelity prototype of our proposed project. Consuelo, Heidi, Annie and I got together during the week and plowed through the assignment. During our craft-making process, we learned a lot about the limitations of our design, and adjusted it accordingly.

Since Heidi and Annie are super artistic, they took charge of drawing out the storyboard and writing up a feasible scenario for the Chameleon Suit.
Heidi and Annie working hard on the paper designs of the suit.
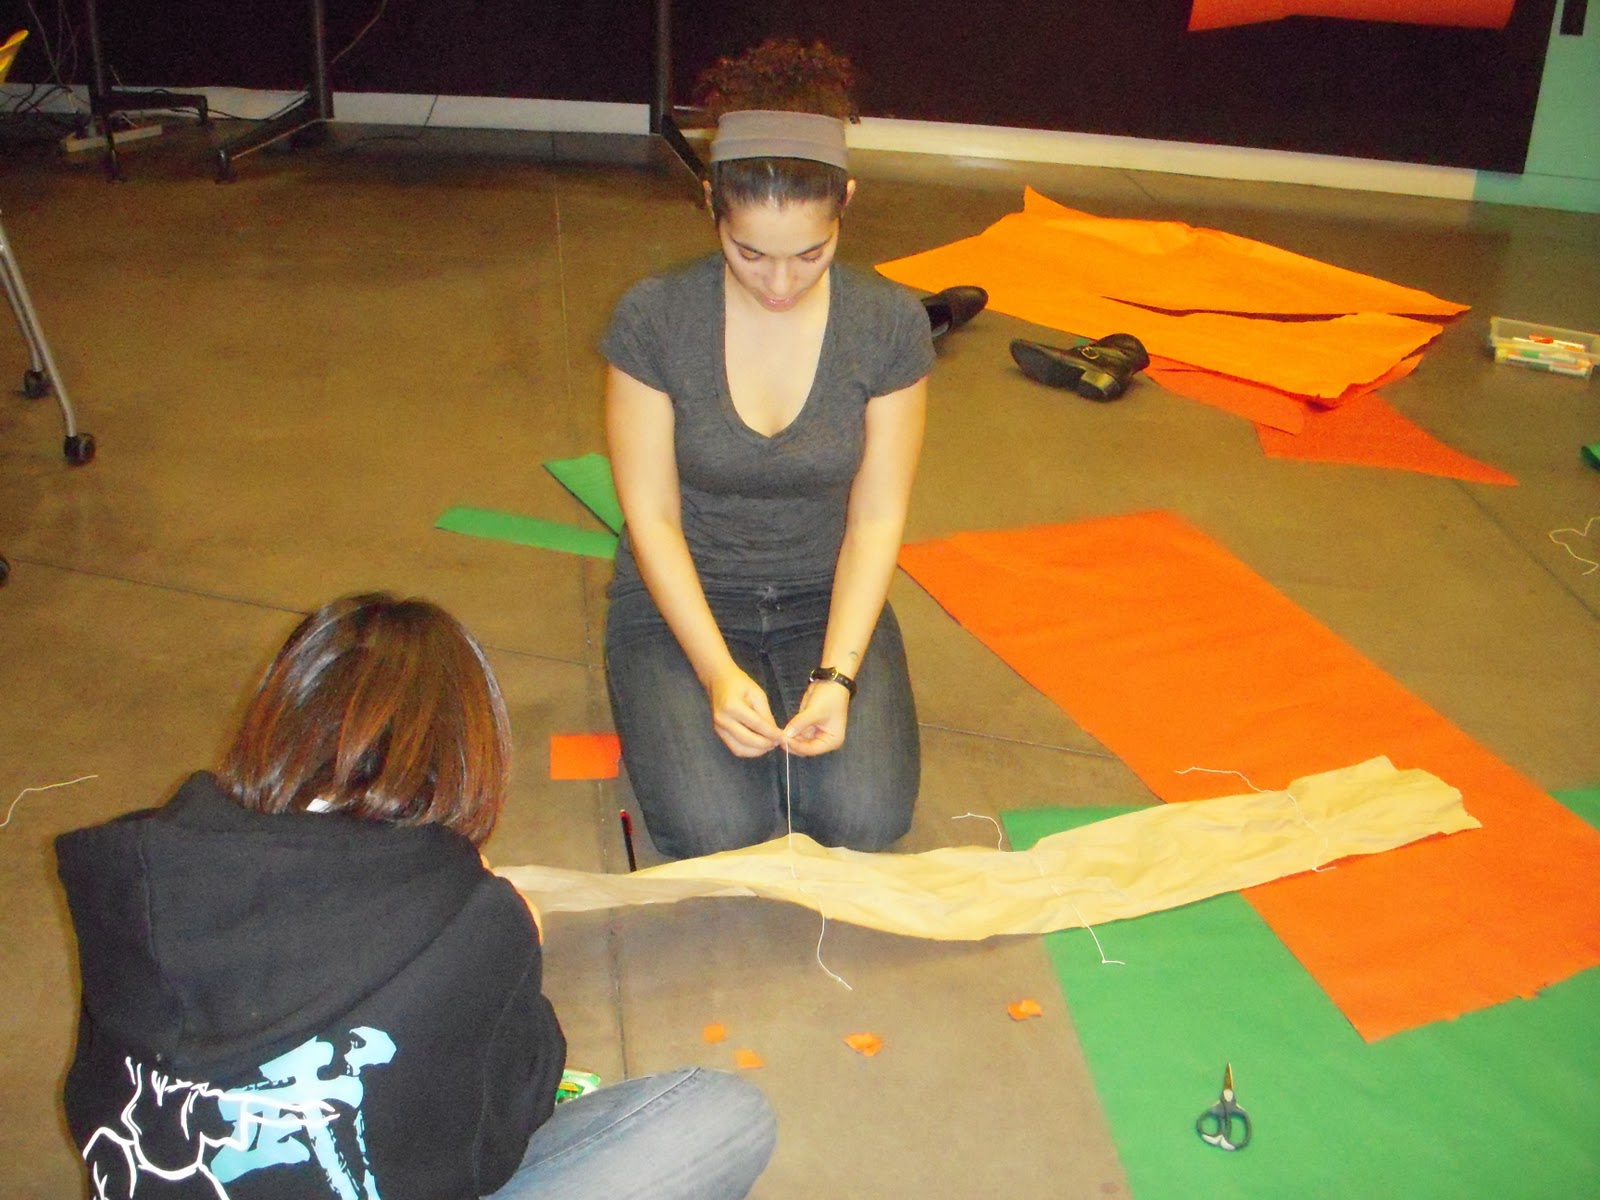
Consuelo and I decided to tackle the actual construction of the suit.
We decided to use those rolls of multi-colored paper provided by Student Activities Office (since we didn't really go buy fabrics) along with some strings we found in the HCI lab. It turned out that the papers we used were super thin and easy to tear, which caused us SO MUCH trouble during the assembly of the suit. We based our suit on Consuelo's body size :) and I focused on making the top portion of the suit.

While measuring and cutting the paper, I realized just how difficult it was to actually make a piece of wearable clothing! There's so much details that need attention, such as shoulder width, arm length, how the shirt is going to fold/bend when the arm moves. So I told myself that before making a more expensive prototype, I'm going to research more into basic cloth designing concepts.
Soon after we started taping different papers together, Consuelo and I realized that because of the quality of the paper, it's almost impossible to fold/roll them up and expect the material to survive a second attempt. So instead of implementing the rolling/folding/bunching fabrics up technique we previously proposed, we adopted an alternative strategy (just for making this prototype) of making two different-sized sections of the limbs (arms and legs), and have the smaller section extend out of the larger section (kind of similar to how a biker would slide up their transparent visor, and the clear plastic would go over the actual helmet). This strategy ensure that the suit will still be wearable, and that it can actually survive our preliminary testing so we can showcase it in class the next day.
The pant trouser here is divided up into two sections. The section on the lower leg will slide up into the bigger section.
We also decided to only implement the arm extension, leg extension, and skirt roll-up features of the suit (because we haven't really thought about how to implement the collar-changing aspect of the design). Eventually with much swearing, tearing (not the crying kind, but the paper ripping kind), and taping, we managed to get the suit on Consuelo.

 Although the mechanisms on the suit are still very faulty, we thought this super-low fidelity prototype managed to deliver the basic idea of our project proposal.
Obviously we realized many shortcomings with the design of the suit (such as how to strategically place the extension mechanisms so they don't hinder/interfere with the wearer's movements, how to create a comfortable clothing template so the suit can actually be wore in real life without the wearer suffering from constant discomfort, and as well as the type of materials we will be using to make the suit, how sturdy they will have to be, etc).
Hopefully as we continue to modify our proposal, we will be able to come up with suitable solutions for these specific problems as well as think of other improvements we can apply to the suit.
Me having fun with the leftover googly eyes ^__^ (Okay, it's kind of creepy)

Heidi and Annie's cute drawings!

UIST '10 Afterthought

So I went to UIST '10 in New York City in the beginning of October. It was such an experience! Since it was my first time attending an academic conference (especially a computer science one), I had no idea what to expect from it. To tell the truth, I honestly thought people wore suits and dress pants at conferences, so that's pretty all I packed into my suitcase (which ended up with me wearing my oversized Wellesley sweater pretty much the entire time).
Aside from that little stump, I enjoyed my weekend there very much! There were so many interesting and unique projects presented from all around the world.

These are some of the presentations that I especially liked:
Hands-On Math: A page-based multi-touch and pen desktop for technical work and problem solving
I was very inspired by the different methods of data organization that this application used. The minimizing a portion of the paper by pinching/folding it is a very cool technique! It made me think about all the text that needed to be scrolled on the GnomeSurfer. If we can implement a similar technique, such as have portions of the gene sequence be minimized in the beginning, and allowing the option to expand them, that that would save users a lot of time and effort scrolling through the entire sequence. (And if we can come up with an awesome animation for the expansion/minimizing of information like they did in this project, then that'd be even cooler). 
Their idea of implementing a pannable workspace is also very applicable to the GnomeSurfer (we actually had a very similar idea about providing additional workspace to users). 

Another presentation that I really enjoyed was Chronicle: Capture, Exploration, and Playback of Document Workflow Histories. So basically this is a tool that records, annotates, and categorizes the different actions done on an image in an image processing software. It records brush strokes, layer creations, color adjustments, and any other type of interactions done on the image. Anyone using the program can just review the entire history process. They can even customize the playback so it'll focus on the actions of a specific tool or an unique area on the image. 
As a below-average occasional user of Photoshop, this is exactly the type of tools that I need! Every time I try to replicate certain effects from online tutorials, I can never really capture the exact methodology used. So having a program that can play back actions on the images is just awesome. 
Being able to review the process of object creation is such an important feature in most applications these days, it's almost an expected feature. 

One of the poster and demo presentations gave me a lot of ideas regarding our superhero costume project. Pinstripe: eyes-free continuous input anywhere on interactive clothing does exactly what it says. The presenters sew sensors into the textile of the garment, which then enables wearers to apply different types of input. The differences in pressure and target area can all be detected and differentiated, which allows so much more freedom in terms of integrating different types of interaction with the garment.The entire time that I was listening to their presentation, I thought to myself: instead of using touch sensors on our Chameleon Suit, which only allows binary inputs, why can't we implement something similar to this technology? Then when the wearer of the Chameleon Suit doesn't even have to wear multiple sensors because the pinstripes can detect all the necessary types of input. 

Overall I saw some amazing projects and ideas during this conference, and I definitely took away a lot of useful knowledge from it. It was a very fun weekend!


Monday, September 27, 2010

Analysis on Topobo

As defined by Van Dam, post-WIMP interfaces are interfaces "containing at least one interaction technique not dependent on classical 2D widgets such as menus and icons" [1]. I guess that makes Topobo a post-WIMP user interface. Topobo is a 3D constructive assembly system with kinetic memory developed by Tangible Media Group at the MIT Media Lab. As a modeling system, Topobo contains both physical inputs and outputs. It allows users to "directly manipulate objects rather than instructing the computer to do so by typing commands" [2], thus incorporating one of the post-WIMP interaction styles - Direct Manipulation. A user's ability to interact with Topobo is not hindered by any technical thresholds associated with programming physical models to move. Instead of writing up codes to make the Topobo blocks move, users can employ the pre-existing naive physics concepts to it. By drawing upon "some of humans' most basic knowledge about the behavior of the physical world" [2], users are able to manipulate the Topobo structures into recreating its previous movements. Instead of being limited by their abilities to express desired movements in programming languages, users can directly interact with the pieces themselves to generate the desired movements. 
However, there're certain tradeoffs in that comes along with implementing an interface that relies upon direct manipulation. The active blocks of Topobo embedded with kinetic energy only allows the duplication of movements physically created by the user. The designers at the Tangible Media Group made a tradeoff between reality and versatility. The range of motion of the Topobo piece and the speed at which it operates are solely dependent upon the physical input done by the user. If the user wishes to have one section of the model spin in a continuous fashion for a set amount of time, he or she would have to physically rotate that section of the model for the said time in order to reach the desired movements for the model. However, if the user was using a traditional GUI where all the movements were programmed into the Topobo blocks, then physically difficult to achieve movements such as continuous spinning or extremely fast rotation are easily accomplished with a simple line of code. The designers have favored a reliance on direct manipulation of the Topobo pieces applying naive physics. 

According to the definitions of TUIs stated by Kenneth P. Fishkin in his A Taxonomy for and Analysis of Tangible Interfaces, a "2D taxonomy is fruitful, one that uses as its dimensions embodiment and metaphor" [3]. So for Topbo, it can be categorized as a full embodiment user interface, where "the output device is the input device; the state of the device is fully embodied in the device" [3]. As an assembly system with kinetic memory, any changes/interactions done on the Topobo blocks are reenacted on the blocks themselves. If you rotate one section of the block by 30 degrees, the blocks will rotate the same section by the same degrees. Both the input and the output in this care are physical. 
In the Topobo assembly system, users manipulate and change the blocks on the structure, and their motions are recreated right back at them with the same blocks. This is a type of "Really direct Manipulation". There's no metaphor needed to describe the input and output process of using this TUI, and thus it can be categorized as a full metaphor. 

References:
1. Van Dam, A. Post-WIMP user interfaces. Commun. AC., 40 (2). 63-67.
2. Jacob, R., Girouard, A., Hirshfield, L., Horn, M., Shaer, O., Solovey, E., and Zigelbaum, J., Reality-Based Interaction: A Framework for Post-WIMP Interfaces. Proc. CHI '08, ACM     Press 2008. 
3. Fishkin, Kenneth. A Taxonomy for and Analysis of Tangible Interfaces. Pers Ubiquit Comput 2004. 8: 347-358. 

Superhero Proposal

Chameleon Suit


So for the TUI project, our group (Team BAMFness) decided to do a Chameleon Suit. 
We live in such a fast-paced world right now, and every second is extremely valuable. There's also an infinite amount of social rules and expectations that we have to follow/meet in our everyday lives, especially in the area of attires and appearances. So to waste even a couple of minutes changing outfits can no longer be seen as acceptable. 


The Chameleon Suit can address this problem. 
By using either a LED display or a projection system, we the team decided to have the suit change its appearances upon command/environment. 
~While on the way to an important business meeting, the unitard suit receives notification from the subject's mobile phone's calendar/synched schedule program about the upcoming meeting.It will project/display a corresponding pattern unto the suit to allow the subject to look presentable for the meeting on time. 
~At a party, sensors within the unitard suit detects high noise level (i.e. music), increased temperature due to people's body close together while dancing, and all other types of environmental cues. Upon receiving information from the sensor, the suit will alter itself to a fashionable party outfit. 
~By using a specific hand gesture/body posture, the subject can activate a color/pattern picking function on the suit. Placing the palm of his/her hand upon a specific color/pattern will allow the camera in the suit to pick up that design and transfer it onto the suit. BAM! Instant fashion statement!
~There can also be a specific number of pre-loaded outfits in the suit itself. By doing a swiping motion across the body while the sensor is activated, the subject can quickly change his/her outfit upon desire. 


This Bubelle Emotion Sensing dress developed by Philips Design gave us the idea that our Chameleon Suit can spontaneously alter its appearance based on different types of inputs. 

The Beat Dress is also very cool. A project created by the students of Malmo University in Sweden, the LED lights within the dress responds to the beats in music. 
There're just so many different possibilities that can be employed for the Chameleon Suit. We are also exploring a method to reproduce invisibility. So far we've came across similar effects done by people at the University of Tokyo, where they used ultra-reflective clothing coupled with a camera-projection system to trick the eyes into seeing "invisibility". 


Team BAMFness believes that the existing technology will enable us to successfully duplicate the proposed "superpower" of the Chameleon Suit. 
Tiny pico projectors such as the 7mm Explay Projetor Engine can be both discrete and powerful at the same time, and products similar to it can definitely be embedded into the suit. 


There're still a lot of technicality issues to be worked out, but hopefully Team BAMFness will be able to come up with a comprehensive draft plan for tackling this project soon! XD